
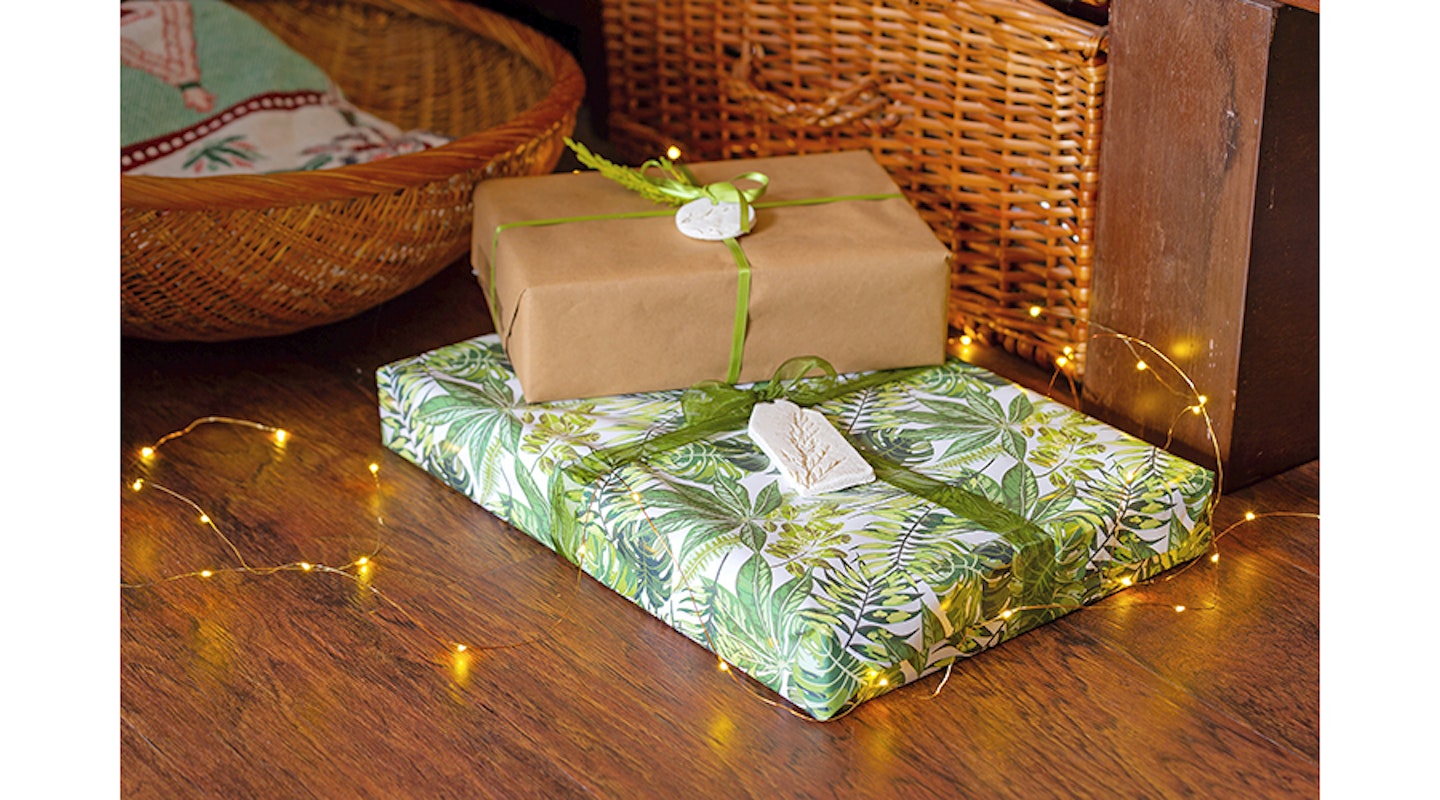
Use a simple salt dough recipe and sprigs of your favourite garden plants to make these gorgeous gift tags. They can be left plain white for simple Scandi style or you can pick out the lines of the leaves with a little green paint for a stronger botanical look. The salt dough will last indefinitely if it’s kept clean and dry, but if you want your tags to withstand wear and tear forever, seal them with a clear waterproof glue.
How to make handmade gift tags
You will need:
✽ Evergreen sprigs
✽ 250g plain flour, plus extra for dusting, 80p/1.5kg tesco.com
✽ 125g salt, £1.35/750g tesco.com
✽ Rolling pin
✽ Silicone baking sheet or greaseproof paper
✽ Cookie cutters and knife
✽ Drinking straw
✽ Ribbon or tag ties
✽ Sharpie pen
Total: £2.15
What to do:
1 Cut sprigs from your garden. Thin and tough evergreen leaves such as rosemary and conifer will leave strong impressions in the dough.
2 Measure the plain flour and salt into a mixing bowl. Gradually stir in up to 125ml of water, stopping as soon as the mixture starts to become sticky. Knead into a firm dough.
3 Rub a little more flour over the rolling pin and roll out the dough onto the silicone baking sheet or greaseproof paper until it’s 5-10mm thick.
4 Lay the foliage sprigs on top of the dough and gently push them into the surface by lightly going over with the rolling pin.
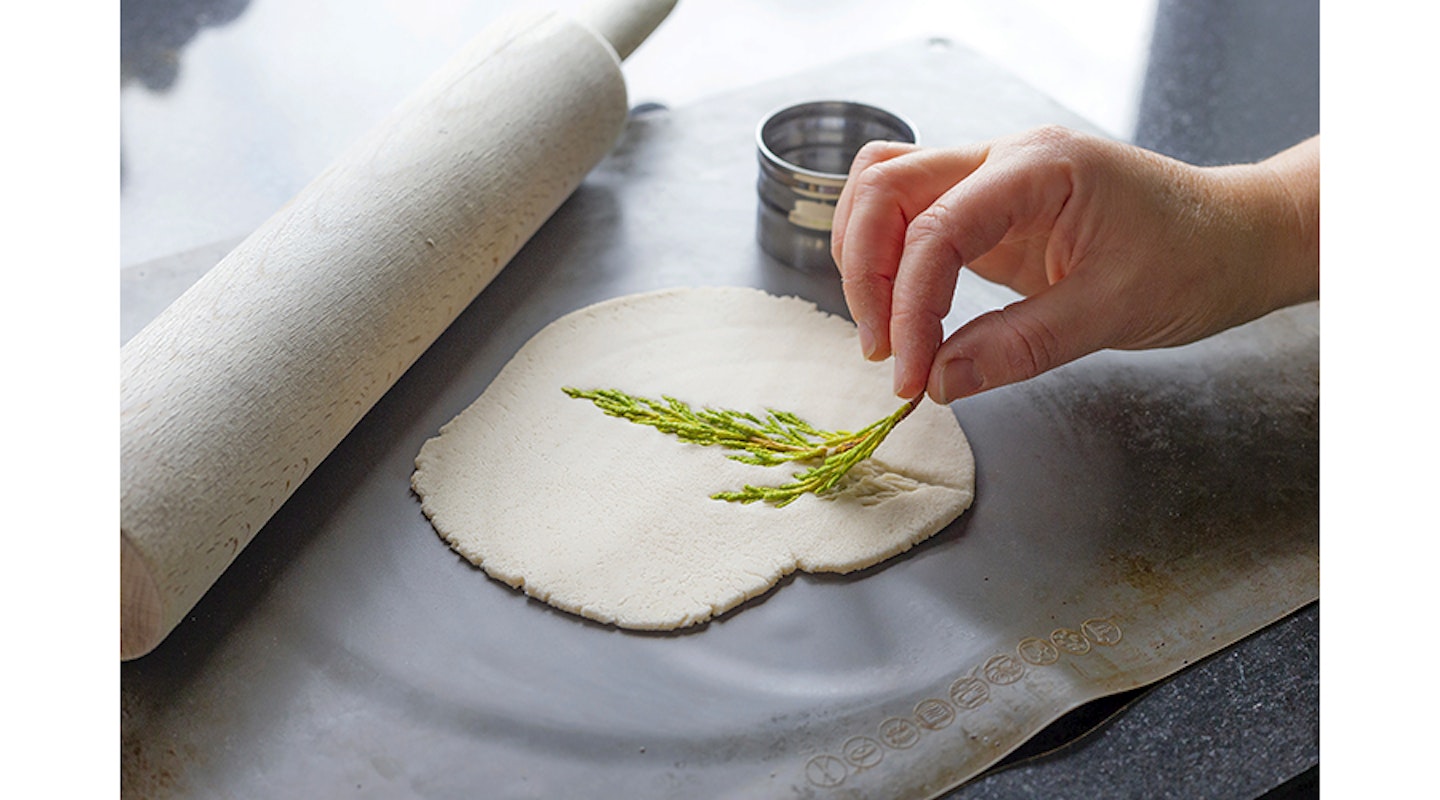
5 Use the cookie cutters to cut shapes into the dough across the best parts of the leaf patterns. To make a gift tag shape, use the knife to draw an oblong with a pointed triangular shape at one end. Peel away the excess dough between the shapes, then use a straw to punch holes for the ribbon or tag ties.

6 Lift the tags on their sheet onto a baking tray. Bake them in the oven on a very low heat for several hours. Check them frequently to make sure they aren’t starting to brown and turn them at least once during this time. You can also leave them to air dry in a warm room – this will take several days but keeps the colour paler.
7 Once dry, thread ribbon or tag ties through the holes and write names on the reverse using the Sharpie pen.
PHOTOS: NEIL HEPWORTH
Share your fave garden DIY, makes and upcycles with us…
...you can email us at moderngardens@bauermedia.co.uk and find us on Facebook Modern Gardens Magazine or Instagram @ModernGardens
What to read next

Discover everything you need to know to make your outside space look fantastic, quickly and easily, with hundreds of simple ideas, designer tricks, affordable products and expert advice with a Modern Gardens Subscription. Find out more about the benefits of being a Member now.